Showing posts with label Sewing - Crafts. Show all posts

Monday, May 21, 2012

Drawstring Bags - tutorial

I love bags. A lot.

Especially now that I'm knitting more and need more project bags. There are different types I like for different purposes. Let's take a look at the Drawstring Bag.

I've looked at a lot of tutorials online to try to come up with the perfect drawstring bag. I wanted to be able to make it in any size and use any fabric I like. And while I love math, I didn't want to have to work it out every time I made a bag or changed the sizing.

So, I made a Spreadsheet:

You just fill in the numbers in the first (green) table and watch the other numbers change. Since I wanted to have various options I had to make various tables.

Here's a visual for what each one means:

Bag Options: 

Outer Fabric:
A - One main piece, direction doesn't matter. This is the easiest!
B - Two main pieces, direction matters.
C - Two main pieces, and a base. In this case you will need to outer main pieces even if the direction doesn't matter.
D - Two main pieces, and two bases. Use this if the base direction matters. Again, the main piece can be directional or not.

Lining:
1 - One piece. This is the easiest. Regardless of what is happening on the outside you can use this.
2 - Two pieces. Only use this if the fabric is directional. You'll only see the very top of this fabric so I'm not sure you really need to use this - UNLESS, you want the bag to be completely reversible.

Now, using all that we can make a bag - or 20. Here's how:

Instructions:
These are really general directions for completing a bag. For each step you have many options for customization.


1. Use the Spreadsheet and enter in the final measurements for your desired bag. Only change the numbers in the first (green) table.

I had some scrap fabric that was 11 inches wide,
so I played with the numbers in the "green" table
to get a cut fabric width of 11 inches.

2. Decide what configuration of outer and lining fabric you would like.

I decided on just one outer and one inner piece.

3. Refering to the appropriate chart, cut out all your fabric pieces. The measurements include your final seam allowance(s).


4. Sew into a big "tube" following the schematic above for outer and lining configurations. Remember:
     -- Always sew with Right Sides Facing (RSF).
     -- Watch the direction of your prints, if direction matters.

Optional: I like to stitch the seam toward the lining -


5. Line up the outer and lining pieces, RSF, and mark your drawstring opening(s) on your main fabric. Sew both open sides, leaving drawstring opening free and about 2-3" free in one side of the lining, for turning.
     -- Think about the thickness of your drawstring when marking the opening. I like 3/4" which works for just about anything.
     --  Be sure to back-stitch at each side of the openings.
     -- The opening in the lining should be about in the center, we will be cutting out the bottom corners so don't have it toward the bottom.
     -- If you are using two lining pieces you could leave the opening in the bottom seam, toward the middle, and then not leave an opening in the side.
     -- You can use one or two drawstrings. Plan openings accordingly.


6. Using the "corner" measurement from the chart, mark and sew all four corners. Trim to match seam allowance. Note: this measurement is the distance from the point to the line you draw.
     -- I find it easier to press the fold.
     -- I just use a pencil to mark.

7. Turn your bag through the opening in the lining, "pointing" all corners. Sew the opening in the lining shut.
You could sew the lining shut
by hand if you want the bag
to be completely reversible.

8. Tuck the lining inside the outer fabric. I like to iron the top seam.

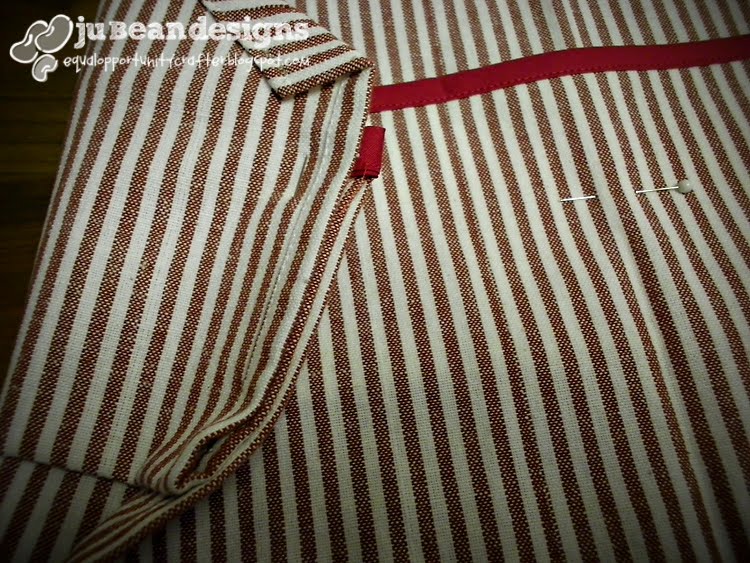
8. Sew the channel for the drawstring(s) by stitching on either side of the opening you made. You can use a straight stitch or a decorative one.

9. If you are making your own drawstring, do that now.

10. Thread the drawstring(s) through the channel.

Enjoy your bag!

Monday, October 24, 2011

The Sewing Drawer of Shame!!

Since working on the boy's Halloween costumes (pictures to come) I have reignited my love of sewing. But, before I get carried away, as I am wont to do, I thought I better clear out my sewing drawer. Turns out its a sewing drawer of shame!
Yes, here are all the bits and pieces that were hiding in that drawer. Before I can get to making all the many wonderful things I want to work on "right now" (!!!!!) I have made a deal with myself - I must complete all the projects in the drawer. I'm posting this so that now I am committing in front of the world (hi mom).

Here's the specifics, in no specific order:

Pants for me that just need buttons, buttonholes, and some hemming.

Christmas Table-topper Quilt. Needs some hand stitching then the back, quilting, and binding.

Random bits and pieces which I may, or may not, need to complete these projects.

Two baby girl diaper covers. Just need elastic on waist and leg holes. I can finish these for my new no-name baby niece, due in a few months.

2 fabric flowers. Just need a clip of some sort ... hair clip, or maybe pin.

Random scraps left over from Ben's quilt. Maybe for some pot holders?

Black material, but and ready to go for 2 vests - one for Ben and one for Dad. Although, by now, Ben will have outgrown the size I cut...guess it's for James.

Spring/Summer tabletop quilt. Back when I didn't know a thing about quilting. I need to rip out all of this red stitching and then try again.

1 king size sheet...blue and white stripes. I bought this with the intention of making a top for myself, maybe. Not sure what I'll do with it, but it has to either get used or thrifted. I guess I could use is as muslin for something else.

Random men's shirts/sweater. These were originally for two matching quilts I was going to make for the boy's beds. Now I'm thinking I'll just make pillows out of them for those beds. Then I can use these, and then buy fabric for the quilts.

This is actually pink lining material. I plan to use this to line a skirt out of some suiting fabric I have in my other sewing cabinet. Let's not even talk about that black hole.

Completed Baby Spit-rags. I made these out of cloth diapers (new and unused, obviously) and a few cute fat-quarters. I guess I better put them in James' closet so they can get used. Or, should I gift them? Or, should I post them up in the etsy shop?

Table-top quilt. I started the machine quilting on this a few months ago, but was having tension troubles. I've since had the machine serviced, so I should really just finish this already!

Black and white knit fabric. I bought this to make a cute tank from a Burda magazine, cut out one front piece, and then promptly put it in the drawer. I have to figure out how to back a ruffle in the front, and I have to cut the rest of the pieces, but this one should be pretty easy.

Hot/Cold Rice bags. I made three of these but haven't finished the covers for them. The idea is, you can remove the cover and wash them. This will require 4 straight lines of stitching...why haven't I done it yet?

Kitchen towels. Just need to add buttons to the tabs.

Also found in the drawer, a completed top that just doesn't fit me (maybe my sister will want it) and a pair of her pants to hem.

As you can see, most of these projects are almost done. I just need to get to it and do all the "boring" parts. The rule now is - I must finish all these projects before I can start on any new sewing projects. I must finish all these projects before Jan 1, 2012. Let's see how it goes.

Monday, September 13, 2010

Hidden Hand stitches {how to}

When making "My Little Man" Ties, or other projects, you may want to hide your stitches. Here's how I did it.
I start by making a knot at the end of my thread then hiding it on the underside of the lining. Bring the needle out at the tip.
Then I go into the lining fabric for about 1/4" then switch to the other side.
Here's a quick drawing of what I mean.
Pull the thread tight as you go and it will be invisible. I used white thread and you can't even see it against the dark blue.

♥Julliana

Thursday, September 9, 2010

Kid's Apron

Getting Ben ready for "pre-pre-school", means making him an art apron.

Oh, how adorable!

Best part - cheap and washable! Here's how.

First, download the pattern. Print this out on cardstock and cut it out.

Materials Needed:
  • 1 tea towel.
  • bias binding, ribbon, rope, whatever you want to tie it on with.
  • Any additional embellishments. Again, ribbons, appliques, bows, flowers, etc.

Tools Needed:
  • Scissors
  • Ruler
  • Sewing Machine
  • Safety Pin
  • Pencil or Fabric Pen

Instructions:

Basic Apron Shape
First print off the template for the "arm holes". I've included both an adult and child size. Choose your size.
Use the template to trace and then cut off the two top corners of the apron (shorter width across the top). Flip the template over to cut the left side.
Note: the tea towels aren't perfectly square...so what...neither are we. Just fudge it a bit.

Now, press this cut edge under about 1/4 inch. Again, don't freak out about being exact...this is an apron...it will get messy. Besides, the pattern on the towel hides a lot of sins. :)
Press the edge under again about 3/4 inch. This will make the casing for the ties. If you want to use a thicker ribbon you may consider making this second fold a bit larger...or let the ribbon bunch in the casing...either way, super cute!
Do this to both "arm holes". Watch your fingers and the hot iron...I like to use steam to really press it good.
Sew close to the edge of your casing. I like to sew from the wrong side (inside) so I can see the edge. I also like to back-stitch at the top and bottom.

Kid's Size Apron
(the adult size is the full length of the tea towel - skip to making the ties)

To make the pocket: Fold the towel up 9" from the bottom. You may wish to decorate this edge with ribbon or ric-rac or whatever. I just used some store bought bias tape.
Once you've decorated your edge, fold it up again (toward the armholes) to create pockets about 4" deep.
Now you will sew your pocket down. Decide how wide you want your pockets and sew a straight stitch through all the layers, back stitch at the beginning and end. I also sewed right near the left and right edges of the apron. you may wish to just follow the hem line. My sewing lines are below in pink.
At this point you could also add appliqué to the top part or some cute ribbon or trim to the bottom edge. I'm making this for a boy so I didn't use any frills.

Making the Ties (for kids and adults)
I used store bought bias tape. Cut about 84" of bias binding and sew along the open edge. If you are using ribbon, you won't need to sew it.
Thread through the casing (using a safety pin) leaving a loop at the top for the neck. I tied the ends of my ties, but you could hem them. I figure, it's a boy's apron and the fraying would be okay.

Enjoy!

♥ Julliana