Showing posts with label svg. Show all posts

Friday, November 4, 2011

Singing Block

Ben's been struggling with singing time. Its part of our bedtime routine and lately he's been fighting it. Maybe its because he knows its bedtime. Maybe its because we are trying to get him to engage with us more by sitting on the blanket and doing all the actions. Whatever it is, we've decided to change it up.
I made a singing time die that we can take turns tossing. Each of us will get one toss, so four songs a night. This should at least bring him back to the group between each song...so he can see what the next song is. By making it more of a game I think it will help him deal with an inconsistent song order.
Want one too? Here's what you need to do.

  • Download the svg file, or the Sure Cuts A Lot 2 file.
  • Cut the pieces out of cardstock. You may want to change the square's to perforate if you are using the svg file. (its already done on the scal2 file)
  • I made pictures for each side using clip art and the song title. I then used markers to make it nice and colorful. I just attached them with scrapbook glue. 

Here's how it goes together.

  • I chose to laminate mine so I did that first.
  • I used hot glue to complete the box.
Enjoy!

Thursday, November 3, 2011

Give Thanks ... and eat

I'm getting ready for Fall and Thanksgiving by changing up my decorations.
I wanted some vinyl on the wall by my shelves. I only had two smallish pieces of brown to work with so, here's what I came up with.
I got it all ready to go and then, had major problems.

First, I didn't change the settings on my Cricut from when I cut out cardstock, so I cut all the way through the vinyl...Had to carefully get it on the transfer paper.

Then, when I put it up, I didn't love how the "and" was so close to the "eat". I also took off two of the dots...because I didn't place it right.

So, I used two little scraps...all I had left, to get a new "and" and dots.
I've been using a pot scrapper to help transfer the vinyl...it looks gross, but I promise its just hard water spots from the dishwasher.

And here's the final result:

You can cut this too! Just download the svg file and cut it on your Cricut. I had to split mine into two pages, one for "Give T" and another for "hanks" and the rest.

Wednesday, March 16, 2011

Cricut 201 Project {Name Chipboard Book} Part 2

Project Steps:
Part 1A - Creating the first page
Part 1B - Completing the design
Part 2 - Cutting the Chipboard <----You are here
Coming soon:
Part 3 - Cutting papers and embellishments
Part 4 - Putting it all together
My "James" book cut out of chipboard.


You will need:

Last time we set up your project in SCAL so that it was ready to go. To cut your chipboard you will need to
  • Cut your chipboard to the right size. I like to reuse old boxes for this. Cereal boxes work great!
  • Load it up on your mat and then into the Cricut.
  • I use the following settings - Blade: 6, Speed: 3, Pressure: 5.
  • In SCAL set the cutter to "Multi-cut" 3 times.
  • click image to see larger.
  • Select "cut" at the top of the screen. (The scissors)
  • Be amazed at the results! I had to set mine up in two different "pages" in SCAL and cut it in two different sets. You may also have to do that depending on the size of your pages. Check out the last post if you need help with setting it up.
Each page of my "James" Book.

The back side of each page. Cereal boxes = cheap!
Next time we'll talk about cutting the papers to cover this chipboard and any embellishments we'll be using. Come on back!

    Thursday, February 10, 2011

    Cricut 201 Project {Name Chipboard Book} Part 1B

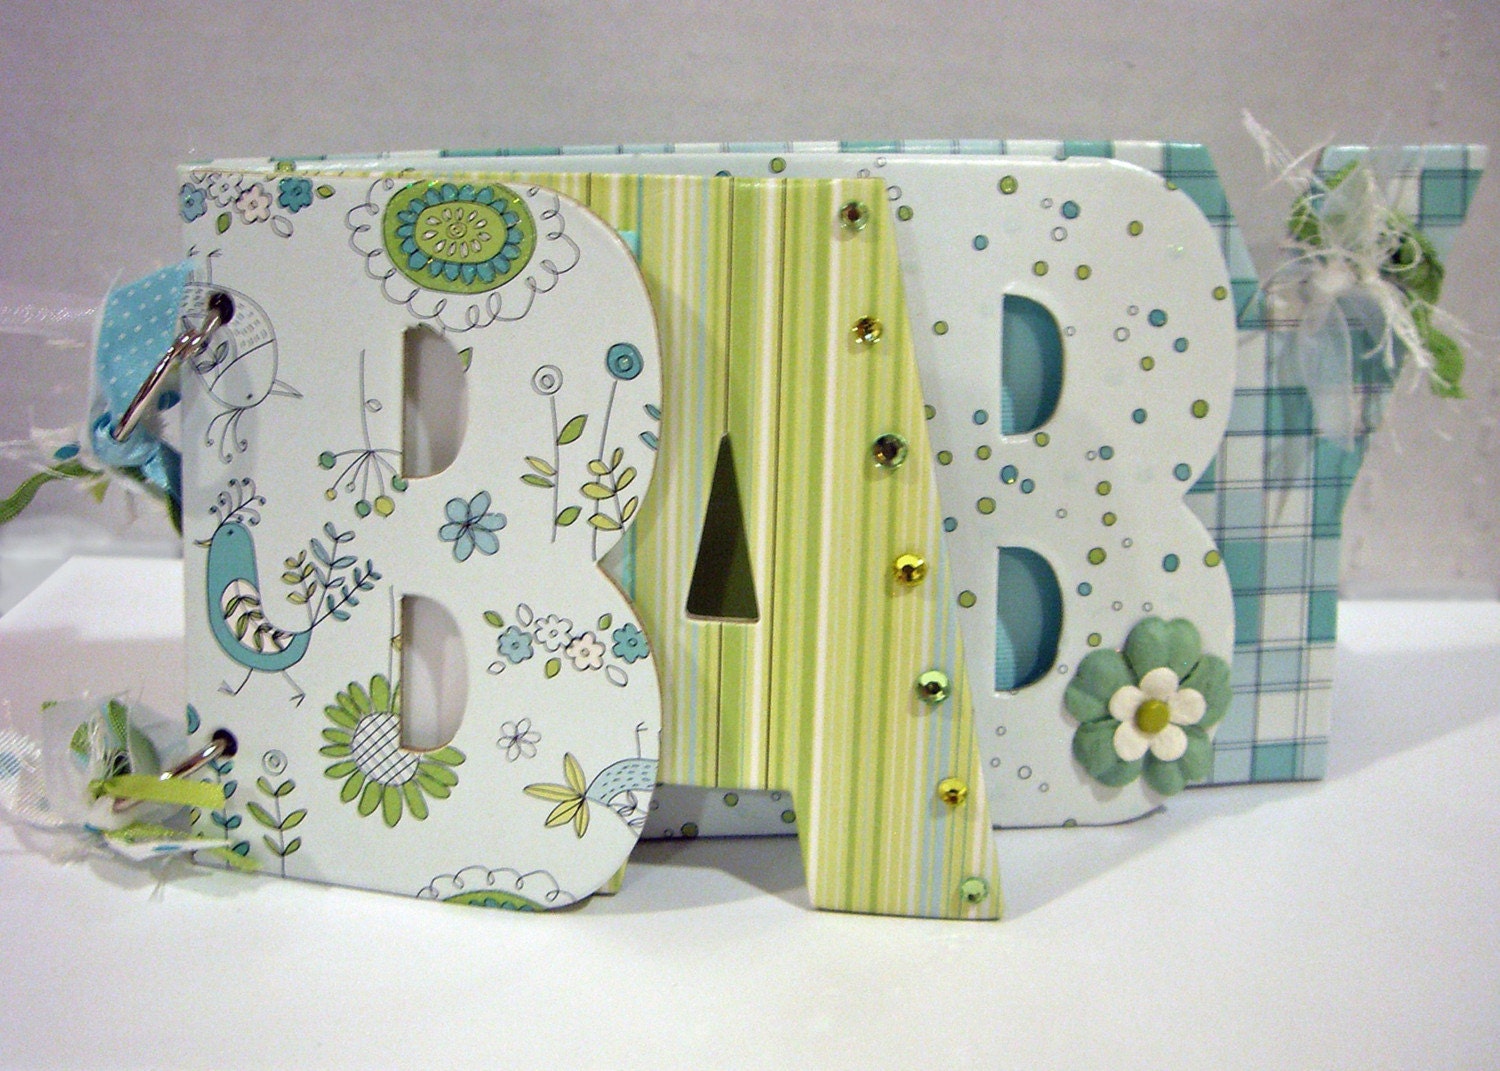
    Let's finish designing our Chipboard "Baby" book (or any other word you want)!

    Project Steps:
    Part 1A - Creating the first page
    Part 1B - Completing the design <----You are here
    Coming soon:
    Part 2 - Cutting the Chipboard
    Part 3 - Cutting papers and embellishments
    Part 4 - Putting it all together

    We are using Inkscape - a free vector graphics editing software. If you haven't yet, go download it right now!

    In this video we'll finish up our digital design by creating the last few pages. We'll look at some issues with fonts and nodes.


    Finally, we'll get it ready to cut in Sure Cuts Alot 2.


    Post any questions you have in the comments below. I will be posting more over the next few days. Come back often!

    ♥Julliana

    Saturday, February 5, 2011

    Cricut 201 Project {Name Chipboard Book} Part 1A

    Let's use what we know about file types and create our own letter chipboard book. You can make any word you want, and use any font you want to totally customize it. This will be a multi-part project. In the end, we'll end up with something like this...

    Baby Book
    or this...
    Friend Book
    it's up to you!

    Project Steps:
    Part 1A - Creating the first page <----You are here
    Coming soon:
    Part 1B - Completing the design
    Part 2 - Cutting the Chipboard
    Part 3 - Cutting papers and embellishments
    Part 4 - Putting it all together

    Let's get started. What you'll need:


    Feel free to post any questions you may have in the comments below. I will be posting the rest of the process over the next few days. Come back often!

    ♥Julliana

    Friday, January 14, 2011

    Cricut 201 {# 1} Understanding File Types

    Whatever happened to 101? I'm not going to be talking about basics - so we are skipping ahead to the intermediate level. I'm assuming you have the following:
    • Cricut - any kind will work. You should also have the USB cable that allows you to attach it to the computer.
    • Sure Cuts a Lot - (abbreviated SCAL) this software allows you to cut out any font/dingbat/clipart you have on your computer...no need to buy expensive cartridges.
    • Inkscape - A free vector graphics editor that gives you even more freedom in creating your own cutting files.
    • A computer - should go without saying, but I said it anyway.
    Today we are going to take a look at different file types so we know what we are dealing with when we create our own cutting files for the cricut. 

    ¨¨¨¨¨°º©©º°¨¨¨¨¨¨¨°º©©º°¨¨¨¨¨°º©©º°¨¨¨¨¨¨°º©©º°¨¨¨¨¨¨°º©©º°¨¨¨¨¨¨°º©©º°¨¨¨¨¨°º©©º°¨¨¨¨¨¨¨°º©©º°¨¨¨¨¨°º©©º°¨¨¨¨¨¨°º©©º°¨¨¨¨¨¨
    Warning: Totally boring awesome computer techno geeky stuff coming up!
    ¨¨¨¨¨°º©©º°¨¨¨¨¨¨¨°º©©º°¨¨¨¨¨°º©©º°¨¨¨¨¨¨°º©©º°¨¨¨¨¨¨°º©©º°¨¨¨¨¨¨°º©©º°¨¨¨¨¨°º©©º°¨¨¨¨¨¨¨°º©©º°¨¨¨¨¨°º©©º°¨¨¨¨¨¨°º©©º°¨¨¨¨¨¨

    Bitmap - a map using bits...for real. Basically it is a file that describes what each bit (point/pixel) looks like. Both JPEGs and PNGs are Bitmaps.

    JPEG
    A JPEG is a file that uses pixels to describe each point. Basically, its made of bunch of squares, each of which is assigned a color. When you zoom out far enough, you see the whole image, not just a bunch of squares. That's why for a while everyone was obsessed with mega-pixels on cameras. You wanted more because this meant your photos had more pixels and were therefore higher quality. This file type is perfect for pictures but doesn't really work for cutting because you can't really change the size of it easily without losing quality.

    JPEG at normal size.

    JPEG at 500% zoom. Notice the pixelated edges.


    PNG
    Similar to JPEG in that it is made up of pixels, but PNGs use better compression so there is less loss of data when saving. Also, it allows for transparency so you can have "clear" backgrounds or "holes" in your image. In a JPEG every pixel has to be assigned a color (so you would sometimes use white for the background, or try to match the background of your webpage) but in PNG you can have "blank" pixels.

    Most programs can auto-trace an image (jpeg or png) and get you a pretty good cutting file depending on the contrast between the pixels.

    SVG
    SVG means Scalable Vector Graphics. A vector is a mathematical description of a point. Basically it describes the location of parts of an image based on mathematical equations rather than assigning colors to points. The beauty of this - besides the mathematics of it all ;) - is that it is scalable (you can multiply/divide it). When you want to change the size of an svg you don't lose any data...its just multiplied. With JPEG the computer would have to "make up" what the new pixels would look like because there is no data. With SVG, there is always data because the equation just spits out a new number.
    svg file at 500% zoom. The edges are sharp and clear. This makes it easier for cutters to work with.
    Font Files
    You can find lots of fonts (and dingbats) online for free! Most fonts are TrueType or OpenType fonts. These fonts are actually vector images, so all vector principles apply. It's easy for SCAL to "trace" a font because it's not really tracing it...its just using the vector paths like it would with an SVG file.

    ¨¨¨¨¨°º©©º°¨¨¨¨¨¨¨°º©©º°¨¨¨¨¨°º©©º°¨¨¨¨¨¨°º©©º°¨¨¨¨¨¨°º©©º°¨¨¨¨¨¨°º©©º°¨¨¨¨¨°º©©º°¨¨¨¨¨¨¨°º©©º°¨¨¨¨¨°º©©º°¨¨¨¨¨¨°º©©º°¨¨¨¨¨¨
    End of totally boring awesome computer techno geeky stuff.
    ¨¨¨¨¨°º©©º°¨¨¨¨¨¨¨°º©©º°¨¨¨¨¨°º©©º°¨¨¨¨¨¨°º©©º°¨¨¨¨¨¨°º©©º°¨¨¨¨¨¨°º©©º°¨¨¨¨¨°º©©º°¨¨¨¨¨¨¨°º©©º°¨¨¨¨¨°º©©º°¨¨¨¨¨¨°º©©º°¨¨¨¨¨¨


    Okay - so was that totally boring?

    The reason you need to understand file types is because we will be using each different kind for different reasons when we use our cricut. Join me next time when we will continue our investigation and create a super fun project.

    Tuesday, October 12, 2010

    Halloween Boo! Banner

    I am thinking that I need to package my digital files to share with everyone. They’re already made…I might as well. So, I’m going to share some svg and scal2 files with you. (want to know what the difference is between svg and scal2…check back later this week. I'll come back and link it up once I post.) Here’s the first of what I hope to be many.


    Create a stylish Halloween bunting banner with this Boo! Banner Kit. Use your favorite Halloween Cardstock (or print some digital paper) and glue it all together. It’s so easy but will really wow everyone who sees this oh so pretty banner.

    Tools Used
    Glue Stick
    Hot Glue Gun
    Paper Trimmer
    Single Hole Punch
    Sure Cuts a Lot 2 Software
    Cricut Expressions Machine

    Paper Used
    {Digital Paper} Summer Driggs, Fangs for the Memories, “WebPaper” (Printed on 3 sheets of 8.5”x11” white textured cardstock)
    2 sheets 12”x12” White Cardstock
    1 sheet of 12"x12" Black Cardstock

    Inks and Embellishments Used
    Black Ink Pad
    Brown Tulle
    White Ribbon
    Orange Ribbon

    SVGs Used
    2 Bracket Flag Banner Pennants
    Boo for Banner
    Ghost for Banner
    or you could use the Scut2 file Boo Banner

    Dimensions
    There’s no need to re-size anything if you’re using scal2. Each shape will be imported at the proper size. Just import and cut! In case you need the sizes I used, here’s what I did.
    SVG File Dimensions Paper Quantity
    2 Bracket Flag Banner Pennants 9.53" width Halloween patterned cardstock Cut 3 sets (6 total)
    Boo 8" height Black Cardstock Cut 1
    Ghost 3.5" height Black Cardstock Cut 1
    Other Cuts
    Accordian Flowers 2" width White Cardstock Cut 10 strips (2 for each flower)
    Remember, if you select the "maintain proportions" option in SCAL you won't need both width/height dimensions. Just one will do.

    Instructions
    Normally, this is where the instructions would go (maybe pictures, maybe a video?). For this one, my camera battery was dead and I was too anxious to get going on it. In the future, I’ll try to be a bit more prepared when crafting. :) For now, if you have any questions on how to do any of this, post a comment or send me an email.

    Design Tips
    When printing out digital paper, I set my printer to “borderless”. Check to see if your printer can do that too. If not, you may need to move your svg/scal2 files a bit so they will cut on the printed paper.
    I used Jamie Lane’s tutorial to make my accordion flower.
    Ink the edges of your accordion flower “petals” after they are glued together (in sets of two) to make it look more antiqued.
    I used the glue stick to attach my accordion flower strips together, but I chose to use hot glue in the centers (from the back) to hold it all together.
    I used brown tulle because the store was out of brown. It looks good and I can use some the left overs for fall decorating.
    I attached the banner to the shelves with small thumb tacks. Tape didn't seem to work well for me.

    I hope you enjoy using this banner for your Halloween decorating! I'll be sharing some more holiday crafts soon!
    (Did I use enough exclamation marks ?!!!? … it would seem that I’m a bit excited about this)

    ♥ Julliana