Showing posts with label kids. Show all posts

Friday, November 4, 2011

Singing Block

Ben's been struggling with singing time. Its part of our bedtime routine and lately he's been fighting it. Maybe its because he knows its bedtime. Maybe its because we are trying to get him to engage with us more by sitting on the blanket and doing all the actions. Whatever it is, we've decided to change it up.
I made a singing time die that we can take turns tossing. Each of us will get one toss, so four songs a night. This should at least bring him back to the group between each song...so he can see what the next song is. By making it more of a game I think it will help him deal with an inconsistent song order.
Want one too? Here's what you need to do.

  • Download the svg file, or the Sure Cuts A Lot 2 file.
  • Cut the pieces out of cardstock. You may want to change the square's to perforate if you are using the svg file. (its already done on the scal2 file)
  • I made pictures for each side using clip art and the song title. I then used markers to make it nice and colorful. I just attached them with scrapbook glue. 

Here's how it goes together.

  • I chose to laminate mine so I did that first.
  • I used hot glue to complete the box.
Enjoy!

Tuesday, November 1, 2011

Halloween Bats

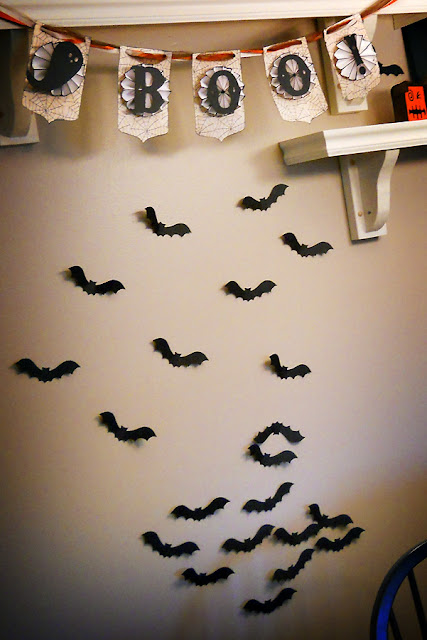
Inspired by Dana at Made, I wanted to have bats too. So, I cut out a bunch on my Cricut and had Ben help me put them up.

Ben's arrangement of the bats.
I adjusted them a bit after Ben was done. We just used cardstock, bending the wings forward a bit. I used regular scotch tape to attach them to the wall. Over the next week they would keep falling off. It gave Ben something to do.

Full view.
I finally had Troy put the shelves back up and put the rest of the Halloween decorations up. I still have to touch up the shelves, but it looks pretty good for now. Now, it's time to switch into Thanksgiving.

Friday, April 29, 2011

James' Blessing Romper

It seems with work, school, kids, other projects, and lack of sleep I can only get a little bit done each day. Such is life with a newborn, I guess. Knowing this was the situation, I started working on James' Blessing Romper in mid-February. what should only have taken a few hours (really that's all it actually took) had to be spread out over many weeks. Here's how it went:

The Process: 
(not every day ... some days I didn't get a chance to work on this at all)
Day 1 - Buy fabric, thread, buttons and tatting (wonder if the tatting is too girly...)
Day 2 - Prewash
Day 3 - Iron
Day 4 - Cut out front bodice and sew tucks. Press.
Days 5-8 - Sew on tatted lace and embroidered feather stitches. (is it too girly?)
And so on...you get the idea.

And then, two weeks before his blessing, my machine broke! The timing was completely off and it took a whole week to fix!!!

But I did finish it! I think it turned out really great, if a bit big.

Pattern Description:
Boy's Blessing Romper. i used the pattern from Sew Beautiful Magazine Issue 71, with some original design variations from Sew Beautiful Magazine Issue 79.

Pattern Sizing:
Sized NB-24 mo. I made the newborn size, which turned out to still be a bit big.  This isn't the fault of the pattern sizing, rather of the baby sizing...he was still quite small. Maybe in another month it would have fit him.

Did it look like the photo/drawing on the pattern envelope once you were done sewing with it?
No. But I made a lot of changes.

Fabric Used:
White cotton quilting fabric for bodice and sleeves. White flannel for the back and pant front.

Were the instructions easy to follow?
Yes. Going back and forth from the original article and the designer version gave me a lot of choices when it came to design.

What did you particularly like or dislike about the pattern?
I really liked just about all of it. It was a bit fiddly because of the design elements, but they turned out much easier to tackle than I expected. Maybe it's my inexperience with heirloom sewing techniques but I ended up having to hand stitch the tatting on and then zig-zag with the machine. Wish I could have done it in one step. But, the instructions were very clear and the pictures were helpful.

Pattern alterations or any design changes you made:
I didn't use any blue edging and didn't use linen and pull threads. I replaced the blue edging on the collar and sleeves with some tatting to match the bodice. I didn't put any embroidery on the belt.

Would you sew it again? Would you recommend it to others?
I don't think I'll have need to sew it again but I do recommend it to others. It is a great first heirloom project and a good one for boys - those are few and far between.

Conclusion:
Great pattern, great instructions. Highly recommend!

Thursday, September 16, 2010

Finger Paints

In preparing for Pre-School I was looking for a good finger paint recipe. I wanted something safe for the kids to be handling, so edible, although it didn't necessarily have to taste good. I found a really great recipe that worked pretty well. I had Ben test it out.
At first he was a bit unsure of it.
And it felt a bit goopy on his hands.
But once he figured it out, he really liked it.
The "paint" itself was really easy to make and actually tasted kinda good - must be all the sugar in it. I think next time I'll make a half or even quarter size batch and maybe cook it a bit longer so it's thicker.
It made a lot! About 10 cups worth. It looks white to start but then you add food coloring to get any color you want. I stored it in small airtight containers for about 4 days and it was still usable. It was also very easy to clean up. Try it out!

Monday, September 13, 2010

"My Little Man" Ties

I am in! I will be competing on Season 5 of So You Think You're Crafty! In fact, I came in second in the voting...how exciting! Thanks for all your votes. As promised, here's the tutorial:
- - - - - - - - - - - - - - - - - - - - - - - - - - - - - - - - - - - - - -
It's so unfair that girls get all the cute accessories. What's a mother of boys to do?
Make Ties!


First, download and print the pattern.

Materials Needed:
outer fabric - 1/2 yard printed woven fabric.  quilting cottons and home decor fabrics work well.
lining fabric - 1/2 yard solid woven fabric.  quilting cotton works well here. lightweight is best.
interfacing - 1/3 yard lightweight interfacing. you don’t need this if you are using a heavy outer fabric.

Pattern Pieces:
Seam allowance is NOT included in the pattern. I recommend you add about 3/8” seam allowance. Feel free to add more or less. {tip: This is a good place to make the tie wider or narrower. for example, you could add a 5/8” seam allowance and sew with a 1/4” allowance.}
#1 - narrow part of tie
cut 1 of main fabric
cut 1 of interfacing (optional)
cut 1 of lining
#2 - wide pard of tie
cut 1 of main fabric
cut 1 of interfacing (optional)
cut 1 of lining

Instructions
Cutting:
Make sure to add seam allowance.
* Cut both pieces from outer and lining fabrics. {note: The “straight of grain” is on the diagonal so the pattern of the fabric will run diagonal, or on the bias. Really, you don’t have to do this, it just helps the fabric curve easier.}

Sewing:
* Iron the interfacing to the wrong side of the outer pieces. {note: This is optional. If you are using a heaver outer fabric (i.e. home decor) you don’t need interfacing. Just follow the manufacturer’s instructions on this.}

* Stitch lining pieces together, and outer pieces together, at the center joint seam, right sides facing. {tip: overlap the points by by your seam allowance.}

* Next, pin the lining to the outer fabric, right sides together, and sew around the entire tie ... that’s right, the entire tie ... trust me!

A note about perfection: Get over it! It will all work out in the end. Here are some "mistakes" I made -
my seam allowances weren't cut perfectly...oh well, once you stitch and trim your seams it won't matter!
also, I sewed the seam folded down...again, it won't matter when the tie is turned inside out.
Basically what I'm trying to say is its okay if this isn't perfect. Its not a wedding dress, its a little boy's tie.
* Clip corners. {tip:If you used a larger seam allowance you may also need to trim your seam allowance a bit. It should be about 1/4”-3/8” wide.}

* Now the tricky part. Cut a small slit in the lining fabric running the length of the tie...make this a few inches long. This is how we will turn the tie out. Don’t worry we won’t see this at all!

* Turn the tie out, poke out the corners, and press the seams.

* While you are at the iron, press the sides of the tie toward the center back. I like to use steam for this to make it a really crisp fold. (watch your fingers!)

* Use a few hand stitches to tack the two sides together...or...use fusible webbing and don’t bother with the hand sewing! {note: if you need some help, check out my hidden hand stitches tutorial}
Now admire your handy work...track down your young man and tie one on him.

How dashing!

♥ Julliana