Showing posts with label Sewing - Fashion. Show all posts

Tuesday, June 19, 2012

Sewing a Basic Wardrobe

One of the podcasts I listen to is Sew-Forth-Now. I really like to hear what Lori's made because her style is so simillar to my own. In January she stared a Sew-A-Long (SAL) for a Basic Wardrobe. While I'm late to the party and am not setting a timeline for myself I'd like to supplement my sad wardrobe with some quality pieces.

Lori created a list of items, and Jayme came up with another list. Together, and taking into account my own wardrobe needs, I've come up with my own list.

Slim Black Pants
The original inspiration for Lori's SAL, the Nate Berkus Show, suggested Ponte Pants. A ponte knit is a thick knit fabric with just a touch of stretch. I would like to make some in black to start. I already own S3686 and think view E would work well.


Dark Skinny Jeans
I've been wanting some skinny jeans for a while, but have been waiting until I'm skinny. :) Well, since these last 15 lbs don't seem to want to budge, I guess I better just make some...I could always make another pair later. I've been wanting to try out Jalie 2908, and it shouldn't be hard to adjust to be skinny.


White button shirt
It is hard to find a button shirt that fits well. I have a generous bust and relatively small waist so if I find a top that fits on top it is large on the bottom. If it fits on the bottom the bottons pull on top. Making my own should solve this problem. I'm thinking S2339 in View B.

Black turtleneck
I like KS3093. I may add a bit more waist shaping. I also think a regular top in various solid colors, like navy and red, etc. would be nice to have. I like KS3766.


Camel/khaki skirt
I have a few skirts I like from various Burda magazines. I also have a khaki plaid suiting in the stash ready to go. I may also want to make a more casual version out of some basic bottom-weight fabric. I've already made a denim version of M3830 so I could make another of those.


Tie Waist Sweater
I have a few knitted cardigans in the works but a sewn one would be nice too. I've already made S2603, and loved it. It was, however, a victim of the great pen-in-the-washing-machine incident of 2010. I would like to remake this.


Black Dress
I'm thinking a knit dress is the way to go since it will be easy care and wear. I like, and own, M5975. View C will be the best for me. I wonder if I'm cool enough to wear this with a nice belt instead of the tie.


Trench-ish Coat
I already had M5525 pined in my "Patterns I Want" board on pinterest. It is a basic trench pattern with varying lengths. I like the knee length and the hip length...who says you can only have one? I also love Duchess Kate's trench with a ruffle at the bottom...shouldn't be hard to modify.


Day Dress
I would love to wear more dresses but I struggle with finding a good casual style that isn't frumpy (think jumper) and works for my lifestyle. I'm open to this but need find a good pattern.
Maybe M6503.

Or B5612

Or B5488


Jacket or Blazer
I already own B4610 and it seems like a nice, basic blazer.


Sweatsuit alternative
I have a pattern for some comfy linen pants- S3796, view A in particular. And, some basic tee's (listed above with turtlenecks).


Other Basic Items I Need Want
Variety of cami's
Pea Coat in a bright color - Kelly green or bright Red.

I think I'll start with the dress skirt since I have the pattern and fabric.

What wardrobe items do you think are a basic must have? Any suggestions on colors/patterns for the above items?


Monday, October 24, 2011

The Sewing Drawer of Shame!!

Since working on the boy's Halloween costumes (pictures to come) I have reignited my love of sewing. But, before I get carried away, as I am wont to do, I thought I better clear out my sewing drawer. Turns out its a sewing drawer of shame!
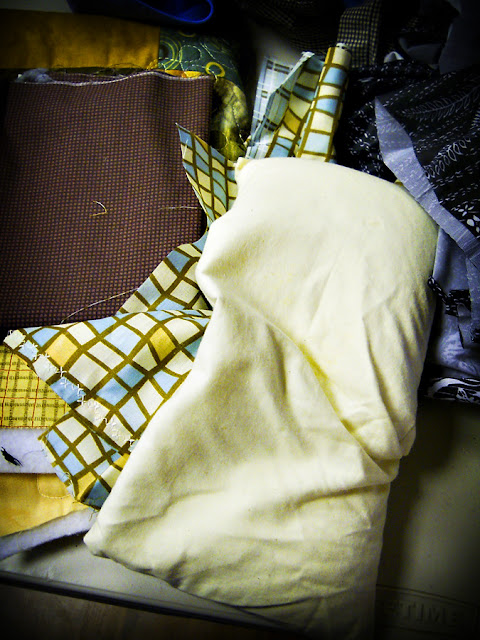
Yes, here are all the bits and pieces that were hiding in that drawer. Before I can get to making all the many wonderful things I want to work on "right now" (!!!!!) I have made a deal with myself - I must complete all the projects in the drawer. I'm posting this so that now I am committing in front of the world (hi mom).

Here's the specifics, in no specific order:

Pants for me that just need buttons, buttonholes, and some hemming.

Christmas Table-topper Quilt. Needs some hand stitching then the back, quilting, and binding.

Random bits and pieces which I may, or may not, need to complete these projects.

Two baby girl diaper covers. Just need elastic on waist and leg holes. I can finish these for my new no-name baby niece, due in a few months.

2 fabric flowers. Just need a clip of some sort ... hair clip, or maybe pin.

Random scraps left over from Ben's quilt. Maybe for some pot holders?

Black material, but and ready to go for 2 vests - one for Ben and one for Dad. Although, by now, Ben will have outgrown the size I cut...guess it's for James.

Spring/Summer tabletop quilt. Back when I didn't know a thing about quilting. I need to rip out all of this red stitching and then try again.

1 king size sheet...blue and white stripes. I bought this with the intention of making a top for myself, maybe. Not sure what I'll do with it, but it has to either get used or thrifted. I guess I could use is as muslin for something else.

Random men's shirts/sweater. These were originally for two matching quilts I was going to make for the boy's beds. Now I'm thinking I'll just make pillows out of them for those beds. Then I can use these, and then buy fabric for the quilts.

This is actually pink lining material. I plan to use this to line a skirt out of some suiting fabric I have in my other sewing cabinet. Let's not even talk about that black hole.

Completed Baby Spit-rags. I made these out of cloth diapers (new and unused, obviously) and a few cute fat-quarters. I guess I better put them in James' closet so they can get used. Or, should I gift them? Or, should I post them up in the etsy shop?

Table-top quilt. I started the machine quilting on this a few months ago, but was having tension troubles. I've since had the machine serviced, so I should really just finish this already!

Black and white knit fabric. I bought this to make a cute tank from a Burda magazine, cut out one front piece, and then promptly put it in the drawer. I have to figure out how to back a ruffle in the front, and I have to cut the rest of the pieces, but this one should be pretty easy.

Hot/Cold Rice bags. I made three of these but haven't finished the covers for them. The idea is, you can remove the cover and wash them. This will require 4 straight lines of stitching...why haven't I done it yet?

Kitchen towels. Just need to add buttons to the tabs.

Also found in the drawer, a completed top that just doesn't fit me (maybe my sister will want it) and a pair of her pants to hem.

As you can see, most of these projects are almost done. I just need to get to it and do all the "boring" parts. The rule now is - I must finish all these projects before I can start on any new sewing projects. I must finish all these projects before Jan 1, 2012. Let's see how it goes.

Friday, June 3, 2011

Bra Problems and Plans


About a year ago I made myself a bra. Then, I got pregnant and (ahem) it was too small. A few weeks ago, I thought I'd try and see if it fit...it did! It was wonderful and comfortable. I don't know about you, but I struggle with finding bras that fit. My cup size is too big for my band size (or so regular stores think). {TMI and FYI: I am a 34DDD, or E, or F depending on the manufacturer.} And, in the end I have to spend  $60+ on one bra!!! For a cheapskate frugal mama like me that is a big deal!

So, I was loving my homemade bra, until...
FAIL!
The strap broke right at the connector!

the plan: make more bras
For about $10 ea in materials - yes I can make 5-6 bras for the price of one store bought bra!
the fail solution: don't use adjustable straps!
I was thinking - What's the reason for adjustable straps on bras? - answer: so it will fit many bodies. Well, since I'm making these bras custom to fit me, I don't need adjustable straps. I can just sew one in at the right length...Problem Solved!

For your Information:
Bra Pattern: Pin-up Girls "Linda" Bra 8235
The pattern and materials were purchased online at ELingeriA. I highly recommend them. They sell different patterns, materials, straps, closures, under-wires...everything you need to make lingerie. They are based out of Germany so everything is in Euros and the shipping takes a bit of time but it is totally worth it! Now that I have the pattern, I just need to get some more material and get sewing. I'll keep you posted!

Friday, April 29, 2011

James' Blessing Romper

It seems with work, school, kids, other projects, and lack of sleep I can only get a little bit done each day. Such is life with a newborn, I guess. Knowing this was the situation, I started working on James' Blessing Romper in mid-February. what should only have taken a few hours (really that's all it actually took) had to be spread out over many weeks. Here's how it went:

The Process: 
(not every day ... some days I didn't get a chance to work on this at all)
Day 1 - Buy fabric, thread, buttons and tatting (wonder if the tatting is too girly...)
Day 2 - Prewash
Day 3 - Iron
Day 4 - Cut out front bodice and sew tucks. Press.
Days 5-8 - Sew on tatted lace and embroidered feather stitches. (is it too girly?)
And so on...you get the idea.

And then, two weeks before his blessing, my machine broke! The timing was completely off and it took a whole week to fix!!!

But I did finish it! I think it turned out really great, if a bit big.

Pattern Description:
Boy's Blessing Romper. i used the pattern from Sew Beautiful Magazine Issue 71, with some original design variations from Sew Beautiful Magazine Issue 79.

Pattern Sizing:
Sized NB-24 mo. I made the newborn size, which turned out to still be a bit big.  This isn't the fault of the pattern sizing, rather of the baby sizing...he was still quite small. Maybe in another month it would have fit him.

Did it look like the photo/drawing on the pattern envelope once you were done sewing with it?
No. But I made a lot of changes.

Fabric Used:
White cotton quilting fabric for bodice and sleeves. White flannel for the back and pant front.

Were the instructions easy to follow?
Yes. Going back and forth from the original article and the designer version gave me a lot of choices when it came to design.

What did you particularly like or dislike about the pattern?
I really liked just about all of it. It was a bit fiddly because of the design elements, but they turned out much easier to tackle than I expected. Maybe it's my inexperience with heirloom sewing techniques but I ended up having to hand stitch the tatting on and then zig-zag with the machine. Wish I could have done it in one step. But, the instructions were very clear and the pictures were helpful.

Pattern alterations or any design changes you made:
I didn't use any blue edging and didn't use linen and pull threads. I replaced the blue edging on the collar and sleeves with some tatting to match the bodice. I didn't put any embroidery on the belt.

Would you sew it again? Would you recommend it to others?
I don't think I'll have need to sew it again but I do recommend it to others. It is a great first heirloom project and a good one for boys - those are few and far between.

Conclusion:
Great pattern, great instructions. Highly recommend!

Monday, September 13, 2010

"My Little Man" Ties

I am in! I will be competing on Season 5 of So You Think You're Crafty! In fact, I came in second in the voting...how exciting! Thanks for all your votes. As promised, here's the tutorial:
- - - - - - - - - - - - - - - - - - - - - - - - - - - - - - - - - - - - - -
It's so unfair that girls get all the cute accessories. What's a mother of boys to do?
Make Ties!


First, download and print the pattern.

Materials Needed:
outer fabric - 1/2 yard printed woven fabric.  quilting cottons and home decor fabrics work well.
lining fabric - 1/2 yard solid woven fabric.  quilting cotton works well here. lightweight is best.
interfacing - 1/3 yard lightweight interfacing. you don’t need this if you are using a heavy outer fabric.

Pattern Pieces:
Seam allowance is NOT included in the pattern. I recommend you add about 3/8” seam allowance. Feel free to add more or less. {tip: This is a good place to make the tie wider or narrower. for example, you could add a 5/8” seam allowance and sew with a 1/4” allowance.}
#1 - narrow part of tie
cut 1 of main fabric
cut 1 of interfacing (optional)
cut 1 of lining
#2 - wide pard of tie
cut 1 of main fabric
cut 1 of interfacing (optional)
cut 1 of lining

Instructions
Cutting:
Make sure to add seam allowance.
* Cut both pieces from outer and lining fabrics. {note: The “straight of grain” is on the diagonal so the pattern of the fabric will run diagonal, or on the bias. Really, you don’t have to do this, it just helps the fabric curve easier.}

Sewing:
* Iron the interfacing to the wrong side of the outer pieces. {note: This is optional. If you are using a heaver outer fabric (i.e. home decor) you don’t need interfacing. Just follow the manufacturer’s instructions on this.}

* Stitch lining pieces together, and outer pieces together, at the center joint seam, right sides facing. {tip: overlap the points by by your seam allowance.}

* Next, pin the lining to the outer fabric, right sides together, and sew around the entire tie ... that’s right, the entire tie ... trust me!

A note about perfection: Get over it! It will all work out in the end. Here are some "mistakes" I made -
my seam allowances weren't cut perfectly...oh well, once you stitch and trim your seams it won't matter!
also, I sewed the seam folded down...again, it won't matter when the tie is turned inside out.
Basically what I'm trying to say is its okay if this isn't perfect. Its not a wedding dress, its a little boy's tie.
* Clip corners. {tip:If you used a larger seam allowance you may also need to trim your seam allowance a bit. It should be about 1/4”-3/8” wide.}

* Now the tricky part. Cut a small slit in the lining fabric running the length of the tie...make this a few inches long. This is how we will turn the tie out. Don’t worry we won’t see this at all!

* Turn the tie out, poke out the corners, and press the seams.

* While you are at the iron, press the sides of the tie toward the center back. I like to use steam for this to make it a really crisp fold. (watch your fingers!)

* Use a few hand stitches to tack the two sides together...or...use fusible webbing and don’t bother with the hand sewing! {note: if you need some help, check out my hidden hand stitches tutorial}
Now admire your handy work...track down your young man and tie one on him.

How dashing!

♥ Julliana