Showing posts with label hybrid. Show all posts

Friday, November 4, 2011

Singing Block

Ben's been struggling with singing time. Its part of our bedtime routine and lately he's been fighting it. Maybe its because he knows its bedtime. Maybe its because we are trying to get him to engage with us more by sitting on the blanket and doing all the actions. Whatever it is, we've decided to change it up.
I made a singing time die that we can take turns tossing. Each of us will get one toss, so four songs a night. This should at least bring him back to the group between each song...so he can see what the next song is. By making it more of a game I think it will help him deal with an inconsistent song order.
Want one too? Here's what you need to do.

  • Download the svg file, or the Sure Cuts A Lot 2 file.
  • Cut the pieces out of cardstock. You may want to change the square's to perforate if you are using the svg file. (its already done on the scal2 file)
  • I made pictures for each side using clip art and the song title. I then used markers to make it nice and colorful. I just attached them with scrapbook glue. 

Here's how it goes together.

  • I chose to laminate mine so I did that first.
  • I used hot glue to complete the box.
Enjoy!

Tuesday, November 1, 2011

Halloween Bats

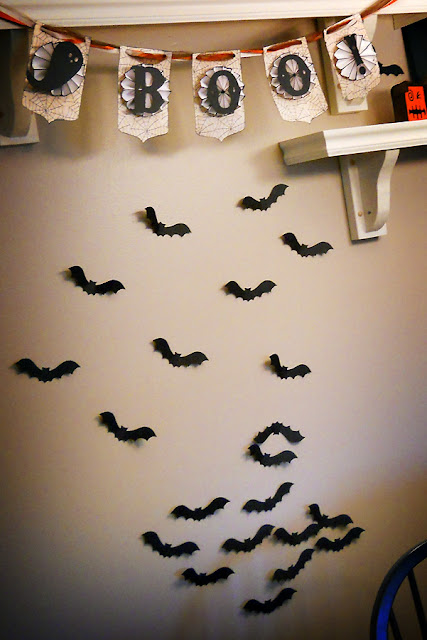
Inspired by Dana at Made, I wanted to have bats too. So, I cut out a bunch on my Cricut and had Ben help me put them up.

Ben's arrangement of the bats.
I adjusted them a bit after Ben was done. We just used cardstock, bending the wings forward a bit. I used regular scotch tape to attach them to the wall. Over the next week they would keep falling off. It gave Ben something to do.

Full view.
I finally had Troy put the shelves back up and put the rest of the Halloween decorations up. I still have to touch up the shelves, but it looks pretty good for now. Now, it's time to switch into Thanksgiving.

Wednesday, March 16, 2011

Cricut 201 Project {Name Chipboard Book} Part 2

Project Steps:
Part 1A - Creating the first page
Part 1B - Completing the design
Part 2 - Cutting the Chipboard <----You are here
Coming soon:
Part 3 - Cutting papers and embellishments
Part 4 - Putting it all together
My "James" book cut out of chipboard.


You will need:

Last time we set up your project in SCAL so that it was ready to go. To cut your chipboard you will need to
  • Cut your chipboard to the right size. I like to reuse old boxes for this. Cereal boxes work great!
  • Load it up on your mat and then into the Cricut.
  • I use the following settings - Blade: 6, Speed: 3, Pressure: 5.
  • In SCAL set the cutter to "Multi-cut" 3 times.
  • click image to see larger.
  • Select "cut" at the top of the screen. (The scissors)
  • Be amazed at the results! I had to set mine up in two different "pages" in SCAL and cut it in two different sets. You may also have to do that depending on the size of your pages. Check out the last post if you need help with setting it up.
Each page of my "James" Book.

The back side of each page. Cereal boxes = cheap!
Next time we'll talk about cutting the papers to cover this chipboard and any embellishments we'll be using. Come on back!

    Thursday, February 10, 2011

    Cricut 201 Project {Name Chipboard Book} Part 1B

    Let's finish designing our Chipboard "Baby" book (or any other word you want)!

    Project Steps:
    Part 1A - Creating the first page
    Part 1B - Completing the design <----You are here
    Coming soon:
    Part 2 - Cutting the Chipboard
    Part 3 - Cutting papers and embellishments
    Part 4 - Putting it all together

    We are using Inkscape - a free vector graphics editing software. If you haven't yet, go download it right now!

    In this video we'll finish up our digital design by creating the last few pages. We'll look at some issues with fonts and nodes.


    Finally, we'll get it ready to cut in Sure Cuts Alot 2.


    Post any questions you have in the comments below. I will be posting more over the next few days. Come back often!

    ♥Julliana

    Saturday, February 5, 2011

    Cricut 201 Project {Name Chipboard Book} Part 1A

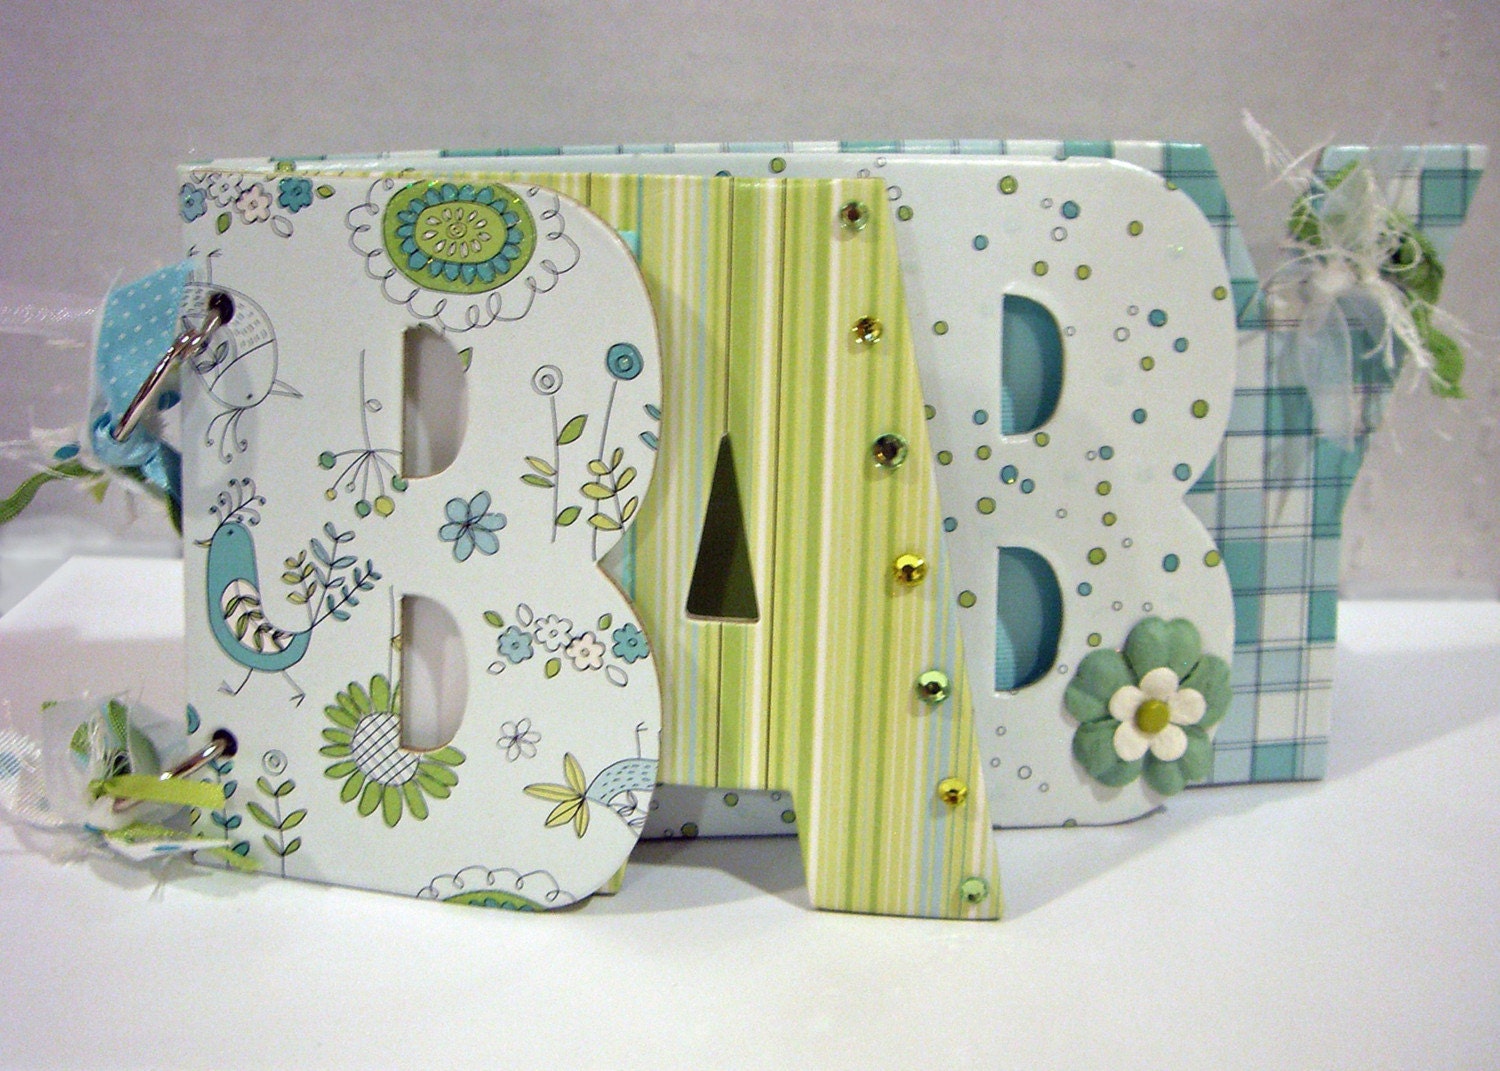
    Let's use what we know about file types and create our own letter chipboard book. You can make any word you want, and use any font you want to totally customize it. This will be a multi-part project. In the end, we'll end up with something like this...

    Baby Book
    or this...
    Friend Book
    it's up to you!

    Project Steps:
    Part 1A - Creating the first page <----You are here
    Coming soon:
    Part 1B - Completing the design
    Part 2 - Cutting the Chipboard
    Part 3 - Cutting papers and embellishments
    Part 4 - Putting it all together

    Let's get started. What you'll need:


    Feel free to post any questions you may have in the comments below. I will be posting the rest of the process over the next few days. Come back often!

    ♥Julliana

    Tuesday, October 12, 2010

    Halloween Boo! Banner

    I am thinking that I need to package my digital files to share with everyone. They’re already made…I might as well. So, I’m going to share some svg and scal2 files with you. (want to know what the difference is between svg and scal2…check back later this week. I'll come back and link it up once I post.) Here’s the first of what I hope to be many.


    Create a stylish Halloween bunting banner with this Boo! Banner Kit. Use your favorite Halloween Cardstock (or print some digital paper) and glue it all together. It’s so easy but will really wow everyone who sees this oh so pretty banner.

    Tools Used
    Glue Stick
    Hot Glue Gun
    Paper Trimmer
    Single Hole Punch
    Sure Cuts a Lot 2 Software
    Cricut Expressions Machine

    Paper Used
    {Digital Paper} Summer Driggs, Fangs for the Memories, “WebPaper” (Printed on 3 sheets of 8.5”x11” white textured cardstock)
    2 sheets 12”x12” White Cardstock
    1 sheet of 12"x12" Black Cardstock

    Inks and Embellishments Used
    Black Ink Pad
    Brown Tulle
    White Ribbon
    Orange Ribbon

    SVGs Used
    2 Bracket Flag Banner Pennants
    Boo for Banner
    Ghost for Banner
    or you could use the Scut2 file Boo Banner

    Dimensions
    There’s no need to re-size anything if you’re using scal2. Each shape will be imported at the proper size. Just import and cut! In case you need the sizes I used, here’s what I did.
    SVG File Dimensions Paper Quantity
    2 Bracket Flag Banner Pennants 9.53" width Halloween patterned cardstock Cut 3 sets (6 total)
    Boo 8" height Black Cardstock Cut 1
    Ghost 3.5" height Black Cardstock Cut 1
    Other Cuts
    Accordian Flowers 2" width White Cardstock Cut 10 strips (2 for each flower)
    Remember, if you select the "maintain proportions" option in SCAL you won't need both width/height dimensions. Just one will do.

    Instructions
    Normally, this is where the instructions would go (maybe pictures, maybe a video?). For this one, my camera battery was dead and I was too anxious to get going on it. In the future, I’ll try to be a bit more prepared when crafting. :) For now, if you have any questions on how to do any of this, post a comment or send me an email.

    Design Tips
    When printing out digital paper, I set my printer to “borderless”. Check to see if your printer can do that too. If not, you may need to move your svg/scal2 files a bit so they will cut on the printed paper.
    I used Jamie Lane’s tutorial to make my accordion flower.
    Ink the edges of your accordion flower “petals” after they are glued together (in sets of two) to make it look more antiqued.
    I used the glue stick to attach my accordion flower strips together, but I chose to use hot glue in the centers (from the back) to hold it all together.
    I used brown tulle because the store was out of brown. It looks good and I can use some the left overs for fall decorating.
    I attached the banner to the shelves with small thumb tacks. Tape didn't seem to work well for me.

    I hope you enjoy using this banner for your Halloween decorating! I'll be sharing some more holiday crafts soon!
    (Did I use enough exclamation marks ?!!!? … it would seem that I’m a bit excited about this)

    ♥ Julliana

    Thursday, October 7, 2010

    Hybrid * Recipe Cards * Freebie

    My sister and I are throwing a shower for my other sister next week. The theme is recipes and we wanted everyone to bring a recipe as part of their gift. I decided to make up some basic recipe cards using my sister's "colors" so they would match her kitchen. These were included with the invitation so her recipe box would be super cute!
    They turned out so well I thought I'd share! I made these very basic so the focus is on the recipe. There is a "paper strip" on the left side and room for ingredients and directions. This time I didn't include lines on the back (for longer recipes). I figure you could just write on the blank back side if you need more room - plus it saves on printing costs.
    You could just type in your recipes and print these on your home computer a few to a page. I sent the file to my local copy shop and had them print up a bunch of each so I could give the leftovers as a gift to the bride.
    Want to make your own? I've included my recipe cards along with a blank template so you can make your own in your own colors...or just print of mine, tie them in a bow and call it a gift!

    Why is this hybrid? Well, because I can call it whatever I want! :) No, really, I call it hybrid because I printed them and will write on them...I guess if you typed and printed you could call it fully digital - in the end does it matter? They are just cute cards...don't over think it. :)

    Enjoy!

    ♥ Julliana

    Tuesday, October 5, 2010

    My New To Do List *Digi Freebie

    I'm always making lists and have random post-its and scraps of paper all over the house. in an effort to organize everything onto one master list I've decided to make some daily lists to go on my fridge.
     Each day's list was printed on a 5x7 photo an then laminated. I punched a hole in the top so I could use a binder ring and hook-magnet to attach to the fridge.
    Each day has four categories - cleaning, to do, appointments, menu. This way I can keep all my lists together! The idea is to write on it with an overhead marker (which can be wiped off with a damp cloth). I printed up two weeks worth so I can plan ahead.
    I wanted cute handwritten date titles, so I made some myself using Inkscape. I highly recommend this program as a free alternative to Adobe Illustrator.

    Now you too can have my handmade date stamps:

    Enjoy!
    ♥ Julliana

    Thursday, August 5, 2010

    Mother's Day Gift.

    Front Cover. I'm obsessed with silhouettes...this one was done on the cricut!
    Yes, Mother's Day was many months ago, but I figure I might as well share. I made mini-scrapbook albums for my mom and mom-in-law, and of course for myself. Here's how:
    I love seeing all the colors of all the pages.
    First, I do all my scrapbooking digitally, so I did that like normal. Then when I was finished with his 2009 pages, I created a photoshop action that would automatically resize them into 4x4 then create a "page" that was 4x6 so i could print them out as pictures. I just got them printed at Costco.
    For the most part I've laid the pages out chronologically.
    Some pages are two page spreads, so some pages had to be
    moved a round a bit.
    I cropped them down square. Then came the hard part - layout. I figured out the order and glued them front to back. Finally, I borrowed my friend's laminator and laminated them all. They are pretty sturdy pages which is exactly what I wanted.
    So fun to see how small his hand is.
    I had an extra page in the back, so I helped Ben make a hand-print. Mine is slightly smudged...but it shows how "easy" it was to make.
    This is a nice thick brag book, about 1 1/2 inches.
    Oh, and I punched a hole in the upper left corner and ran a binder ring through it. I think it turned out super cute and I love to look at it. I still need to get his 2009 book printed out (as a book) but this works for now.
    ♥ Julliana

    Tuesday, July 27, 2010

    fhe in a jar


    Do you find it hard to hold Family Home Evening every week? Do you have trouble coming up with lesson ideas? If you are like me, you don't really need a full lesson, its just the two of you (and maybe a small child, or older kids who are sick of playing silly games) and you just want to get in and out without too much trouble. Here's your solution! FHE in a Jar!


    Simply pull out a suggestion slip and do what it says. Each strip includes a song, a scripture and discussion points. Easy!

    This .pdf file includes all the pieces you need to put together this jar - just print and glue! It includes strips of cardstock with suggestions for FHE. This would be great for newlyweds or older couples with either older kids or empty nests.

    I've also included all the instructions and suggestions to make this super easy. You can buy the the digital file at my etsy shop.

    ♥ julliana